

The Last of Us Part II Tips Guide: Dealing With the Giant Infected, Finding the Safes and A Few Special Arcade Games
We’ve covered the general basics of how to get through The Last of Us Part II with our general guide from a couple of weeks ago. But now it’s time to dig into the nitty gritty and really help you out with some key parts of the game – namely, how to deal with one of the largest enemies you’ll come across, and find some safes loaded with hidden goodies. Oh, and there’s some arcade games you can track down as well.
Let’s get started first with the boss fight against the Giant Infected, because he’s a handful and will rampage you quite easily if you’re not careful – even on the easiest level of difficulty. Here’s a walkthrough of how to take care of it.
Dealing With the Giant Infected

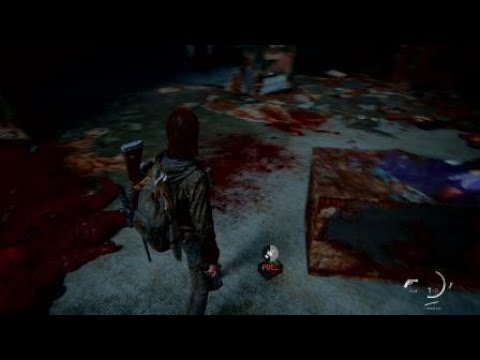
You’ll come across this enormous behemoth during the Ground Zero mission, in the hospital basement. This is going to require basically chipping away at him while keeping your distance when he strikes back. Otherwise, you’re going to get mowed down like grass. Firstly, don’t think you’re safe staying still. This creature will have no trouble bursting through walls to get to you. And if it grabs you at a pivotal point, it’s game over, so remember to keep your distance. The key here is to find pillars in the stage. That way, it can’t straight-up charge you, and has to circle around in an effort to get to you.
You’ll need to find your spots to strike with firearms, so make your shots count. This is especially true on the higher difficulty, as ammunition will be sparse. Figure out the space around you and remember to keep those pillars in mind.

The Safe Locations and Combinations
Here’s a general guide of where you can find all the safes in the game, as well as their necessary combinations. Inside, you’ll find journal entries and other goods that can help you out as you get closer to 100 percent completion.
Jackson, Patrol, Supermarket, Combination 7-20-13
Seattle Day 1, Downtown, Bank “Safe Deposit Lockers” room, Combination 60-23-06
Seattle Day 1, Downtown, Courthouse, Combination 86-07-22
Seattle Day 1, Downtown, West 2 Checkpoint, Combination code 0451
Seattle Day 1, Capital Hill, Thrift shop, Combination 55-01-33
Seattle Day 2, Hillcrest, Auto shop, Combination 30-82-65
Seattle Day 2, The Seraphites, Apartment building, Combination 10-08-83
Seattle Day 2, The Seraphites, Weston Pharmacy, Combination 38-55-23
Seattle Day 3, The Flooded City, Abandoned building, Combination 70-12-64
Seattle Day 1, On Foot, Trailer, Combination 17-38-07
Seattle Day 1, Hostile Territory, Jasmine Bakery, Combination 68-96-89
Seattle Day 1, The Coast, Ship deck, Combination 90-77-01
Seattle Day 2, The Shortcut, Apartment Building, Combination 30-23-04
Seattle Day 2, The Descent, Gym, Combination 12-18-79
You’ll also be able to find combinations with notes within the game, but this should make things a little easier.
Oh, What You’ll Find In the Arcade
If you pay a visit to the arcade – and deal with the Bloater as featured in the video above – you’ll have to look around and find a couple of significant machines. The first is The Turning, which was also featured in the first The Last of Us game.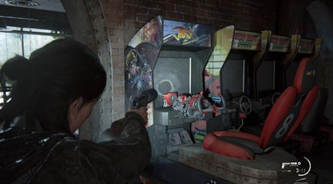

There are other things to keep an eye out for, too. There’s a person in the basement of the WLF Base that’s playing a PS Vita with Jak and Daxter: The Precursor Legacy on it (as part of the Jak and Daxter Collection). And what’s more, you’ll find a PlayStation 3 in Ellie’s house, complete with games like the first two Uncharted titles and, of course, Jak and Daxter. (What, no Way of the Warrior?!)

These are all cool things to look out for in the game, so sit back and enjoy The Last of Us Part II.
And make sure to check out our review if you haven’t already!